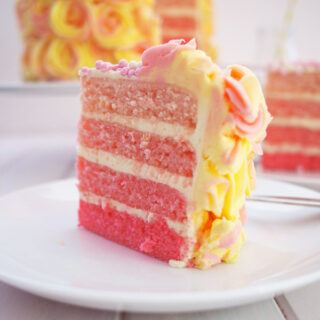
The challenge is an ombre cake. That's cool, I've not made one of those before. Hmmmm, let's make the cake a pink lemonade cake, because I've not made one of those before either. Icing? Yes I need to ice it. Let's pipe flower rose thingies, because I've never piped icing onto a cake before. Oh hang on, let's make the iced rose thingies dual coloured, because the YouTube video (obviously a pro that has made rose thingies many times before) makes it look like a breeze, and I'm an idiot.
The challenge has been set by friend, fellow blogger, MasterChef contestant 2011 and cook book author, Billy Law. Billy has started the 'Have You Eaten? Baking Club'. But Sara, 'Have You Eaten?', that's a interesting name for a baking club. Well, it just happens that the baking club has been named after Billy's delicious cookbook of the same name.
September marks our first challenge, and of course I have made it more of a challenge than it needs to be. I am no stranger to the kitchen. I can bake a cake, but I'm a simple girl when it comes to how they look. Never have I piped icing onto a cake before. I have smeared icing on with a knife before, but never something pretty and piped. An extra challenge with the ombre cake was not only is the top piped but the sides as well.
After reading Billy's recipe a thousand times and much on-line research, a plan was in motion. I can't express how nervous I was. Would the rose thingies stick to the side of the cake? Or would they fall off and look like a trashed bridal bouquet? Would they actually look like flowers of any description at all or just a wiggly mess?
Of course I didn't want just simple one colour flowers and saw a cool technique where two colours were combined. Would my colours meld into something that resembled a clown throwing up?
Then there was the cake itself. The recipe called for 1.5kg of butter icing. That's a lot of sweet buttery goodness. I wanted a cake that would stand up to the sweetness and contrast it. This is when the thought of lemon danced in to my mind. It was then a case of what colour I wanted to make the cake. Decision was made on pink ombre, and my pink lemonade ombre cake was born.
I did alter Billy's recipe, by removing the milk and replacing it with freshly squeezed lemon juice. Zest of one lemon was also added to achieve a strong lemony flavour.
Important Note: The cake layers in this cake aren't very thick. Each layer will end up being around 15-20mm thick. If you feel you would like thicker layers, then please double the recipe. I feel the thinner layers work very well as the cake is very tart, dense and balances well with the amount of butter cream icing. Please be warned if you do double the mixture you may end up with lemon overload.
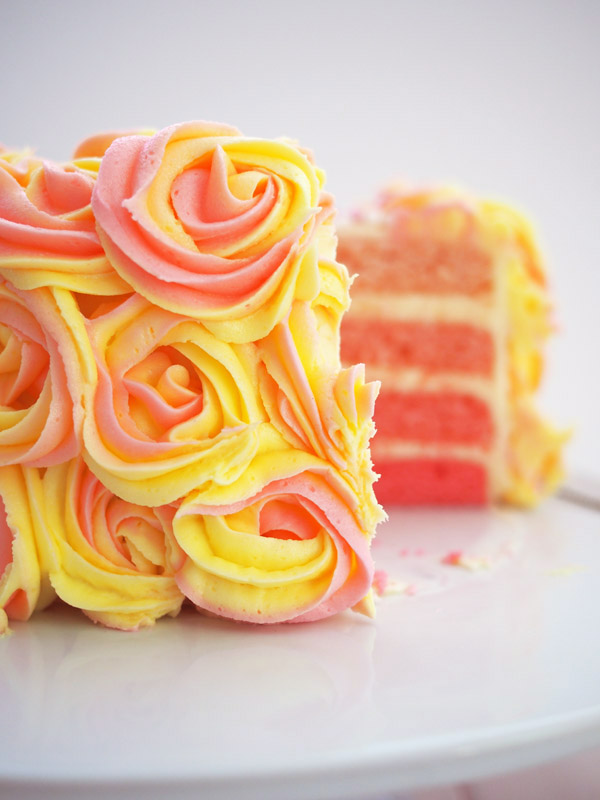
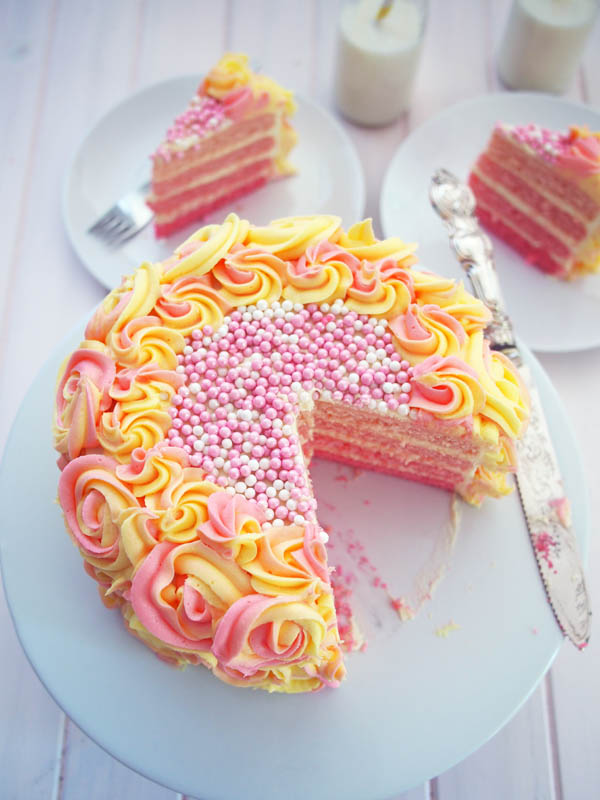
How did I go with icing the cake? Ha! I managed to shove my thumb through my piping bag mid pipping. Resulting in me swearing like a wharfie as I ran to the kitchen to grab another pipping bag to shove over the top of my broken one. I discovered that even though these roses are meant to be the most easiest to pipe, they aren't. There is a technique involved which I think I achieved for only two of my flowers. To my surprise using two colours of icing in the same bag, worked! I really thought this was where I was going to have issues. On top of that I ran out of icing to finish piping rosettes on the top of the cake. Thank goodness for a stash of sugar pearls in my cupboard to fill the void.
The result, a tart lemony butter cake that tamed all that sweet butter icing. The cake was a success as far as I am concerned. Sure, there are prettier cakes with perfectly piped icing floating around the web, but for my first attempt, I am thrilled.
Printable Recipe

Pink Lemonade Ombre Cake
Ingredients
- For the cake
- 200 grams self raising flour
- 150 grams all-purpose plain flour
- a pinch of salt
- 300 grams caster sugar
- 200 grams unsalted butter softened
- 4 medium eggs
- 2 Teaspoons vanilla extract/paste
- 200 ml lemon juice for a plain cake replace lemon with milk
- Food colouring paste colour of your choice
- Icing for the inside
- 500 grams icing sugar sifted
- 250 grams salted butter
- 8 teaspoons lemon juice
- zest of one lemon
- Icing for decoration
- 500 grams icing sugar sifted
- 250 grams salted butter
- 8 teaspoons (2 tablespoons) milk
- Food colouring paste colour of your choice
- sugar pearls to decorate
Instructions
- Preheat oven at 180C (350F). Grease and line 4 x 20cm cake tins with baking paper. If like me you don't have 4, and only 1 tin, bake them one at a time.
- In a bowl sift flour and salt.
- Cream butter and sugar in a stand mixer (or using hand beaters) on high speed until pale and light. Reduce speed to low and add eggs one at a time, beating well after each addition. Add vanilla extract and mix well.
- Then alternately add flour and lemon juice into the mixture. Beat until smooth and lumps free.
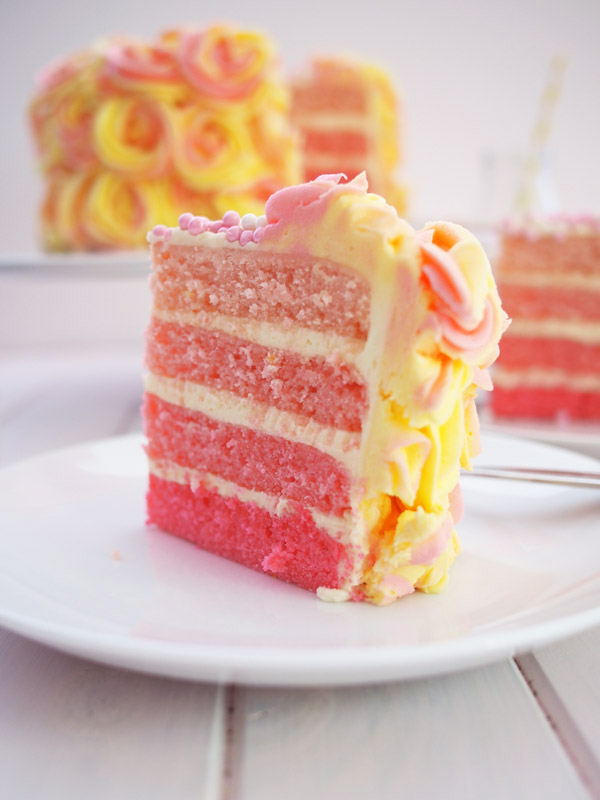
- In four small bowls divide mixture evenly. Add a tiny small drop of food colouring to each bowl and fold it into the mixture. Gradually add more colouring to each bowl from a drop to almost half a teaspoon until you get an even gradient of colour among the four mixtures.
- Pour batter into cake tins, bake each layer for 25-30 minutes or until a skewer inserted into the centre and comes out clean. If you are baking two cakes at the same time, swap the baking trays half way through baking. Once done, let cakes cool in tins for 5 minutes, then tip out and onto wire racks to cool completely before icing.
- To make the buttercream icing, beat butter with a stand mixer (or hand beaters) on high speed until light and fluffy, turn the speed down to low, one tablespoon at a time, add icing sugar slowly, beaten well after each addition. Add milk and beat until well combined.
- Prepare cake for icing, if required, trim the tops and sides to make sure all layers are same size, level and flat. Start from the cake layer with the darkest colour, put a big dollop of icing on top then spread it with a palette knife evenly to make sure the whole top is covered and level. Place the second darkest colour on top, and repeat with more icing, cake, icing and finally the lightest colour cake on top. Now ice the whole cake and make sure the sides and top are smooth with icing. Transfer the cake to refrigerator and let it set for at least 2 hours.
- When you are ready to decorate the cake, make another batch of icing as previously. In two bowls divide icing evenly and colour as desired, I used pink and yellow colouring.
- In a large pipping bag with a large open star tip, place one colour of icing down one side. Then transfer the other colour, carefully placing it down the other side of the bag.
- In a round circular motion pipe rosettes onto the side of your cake and around the top edge. Place coloured sugar peals on top to decorate.
- Alternatively decorate as you desire.
Oven Temperatures
All oven temperatures are fan forced.
Measurement Notes
All measurements are Australian metric standard. All measures are level, and cups are lightly packed unless specified. 1 teaspoon = 5ml / 1 tablespoon = 20mls / 1 cup = 250ml /4 teaspoons = 1 tablespoon.
NUTRITIONAL INFORMATION
The recipe's nutritional information is an approximation based on an online calculator. It is meant solely for reference purposes. If you're looking for precise details, be sure to double-check with your own research.


Veecompany
Hello, I am creating a two tier cake. although my cake will be different than this rosette cake, I still like the fact that you used lemon flavoring to cover the excessive sweet flavoring of The icing.. Since I am doing a smooth texture for my tier cake ans not rosette, Can I still use the same recipe you used for the outer part of your cake and the recipe you used for the inside of your cake. As well, can I use box cake instead of making it from scratch
Sara
Of course you can use the icing and pre made box cake. Just be aware that you will probably end up with more icing than you need as you are not making rosettes. As I stress in the recipe, the cake is a dense cake that does not rise very much. If you are after a two tier fluffy cake then don't use this recipe.
Aznorsha
Hi, Sara.
I love your cake, it was extremely good and wonderful.
Sara
Thanks so much Aznorsha, i am so glad you liked it.
Sheryl
200 ml of milk is listed in the recipe ingredients in the area for the cake recipe, but I don't see it included in the directions.
Sheryl
I see it's fixed now. I wonder if that's the problem some were having. I made this cake a couple of days ago. I had already separated my batter into 4 bowls to color when I noticed the consistency didn't seem right, so added a portion of the milk to each. While in the oven, I read the comments and saw where someone asked you to confirm the amount of lemon juice, so figured it was supposed to be lemon. I had put some juice in already, but when the layers came out I brushed them with lemon juice, which helped to impart the additional flavor. I made this for a birthday party and it turned out nicely. It's so hot here that my frosting consistency wasn't the best, but still pretty. Thank you for the wonderful idea and recipe. We had a pink lemonade type party with pink and yellow decorations, so this was perfect!
Cat Dennis
Hi Sara,
LOVE your cake and I have just the occasion for it. Unfortunately I am completely Metric-ly challenged. I've tried using the conversion charts on the Internet but found there is wide discrepancies from chart to chart. (1 cup of flour = 125 grams on one but 140 grams on another, and 150 grams on yet another). It seems to be a weight versus volume problem so I thought I'd just ask if you knew what the equivalent "cup" measurements would be for your cake? 2 attempts at winging it have produced rather humorous results.! Thanks
Leslie
What a gorgeous cake! I've made a pink lemonade cake before but it wasn't as pretty as yours! I'm stopping by from Pinterest. Happy Thursday!
Trisha
Oh you're a star!!! What a beautiful creation... I'm definitely trying this recipe this weekend! Have a christening next weekend so will definitely give this a go!
Lee
Agree with Devi. This recipe did not yield layers more than 1cm thick.
Would have needed to double the quantity.
Disappointed.
Sara
Hi Lee
Sorry you were disappointed. I went back to Devi via email, and I should of pasted my response here as well.
You should of achieved a slightly thicker layer result than 1cm, but they aren't intended to be thick layers in any case. As mentioned in the post, the cake is a tart lemony butter cake. By removing the milk and substituting lemon juice, this will not make a cake rise as much as if using milk. Just the nature of science.
What it does achieve which is perfect for this cake, is dead even layers. You don't need to trim your cake tops to get even layers of cake for your ombre cake.
I found with the 4 layers, even though they aren't massively thick, you end up with quite a tall cake when you factor in the butter cream layers and then all the piped roses on the outside.
You of course could double the mixture for thicker layers, but I feel with the very tart lemon cake and the copious amount of butter cream, that the 4 layers is enough. It's a pretty rich cake.
Again, it's sad to hear that you were disappointed.
Devi
Hi Sara,
I tried your recipe and my cake didn't end up fluffy at all. Did I do something wrong? I used 20cm diameter cake pans and what I got was only about 1cm in thickness for each color (I also made 4 gradual pink colors). Help??
Alison
Sara, this sounds delicious. Can I just clarify that you used 200ml of lemon juice and the zest of one lemon in the batter? It just seemed a lot of juice, how many lemons were needed?
Thanks
Sara
Hi Alison
Yes I know it seems like a lot of lemon. Reason being is that it offsets the copious amount of butter cream that is used for this recipe. The tart works well with all that icing. I wouldn't use that much lemon under normal circumstances, but I wanted a really tart and lemony cake to battle the icing. Lots and lots of icing.
I used about 3 medium lemons, but it really depends how juicy your lemons are, as to how many you will need. Good trick to get the most juice you possibly can from your lemons is pop them in the microwave for a few seconds to just warm them slightly.
Amanda
Thanks so much for using my technique on your cake! Although it seems you are maybe not even a fan? 🙂 When I first created the Rose Covered Cake technique in 2011, I had no idea it would be used by so many bakers. Your two colored roses is a fun twist! If you are able would you be willing to please site the source for the roses? I hope you understand, and I am sure you always want to be properly credited when you share a new idea and others borrow it. Thanks so much!
Sara
Hi Amanda
Thanks so much for dropping by. You're right, I'm not a fan nor have I seen your blog before. It does look a lovely blog though, very nice.
I haven't given credit for the Youtube tutorial I saw, because, to be very honest, there are quite a few of them up there on Youtube and I looked at probably at least a dozen.
Kudos to you if you were the first one in history to cover an entire cake in rosettes, you will most probably find out you weren't. Rosettes/swirls have been around forever and a day, on top of cakes and on the sides. Wilton can attest to this. Sadly your blog (as lovely as it is) is not the inspiration behind this cake.
Iron Chef Shellie
oh my stars!! heaven! It looks amazing!
I wanted to be part of the challenge but ran outta time 🙁 such is life! Well done babe!! x
Sara
Thank you! So little time and so much to do, I know that one. Hope you can join in on the next one.
john | heneedsfood
Sara, if I didn't know this was your first ombre cake, I'd have thought you were a pro. This cake looks perfect to me. Perfectly piped, perfectly two-toned. Just perfect!
Sara
Awe, thanks so much John! You're a sweetie.
Anna @ The Littlest Anchovy
Whoa this is gorgeous! I am so impressed - I would love to be able to make this!
Sara
Thanks so much Anna.
billy @ a table for two
So purrdddy!!!!! I love it Sara! If this was your first attempt on piping, ombre and all the hurdles you mentioned, then you deserve a gold star!
Sara
Thanks Billy!
Helen (Grab Your Fork)
Wow this looks stunning! Well done you! Professional baker might be your next calling!
Sara
Thanks Helen, but I don't think I see professional baker on the cards for me.
pete
Thanks for the recipe for this cake Sara! alot of the time they don't put the recipe up on these type of sites which is frustrating......I would love to make this for my daughter for her birthday....with the assistance of my wife of course hehe. Will let you know how it goes
Sara
Do let me know how it goes!
Julie
oh my, what a beautiful cake well done Sara!! Love the flavour combo as well 🙂
Sara
Thanks Julie, I was happy with how the combo worked out.
Rita (mademoiselle délicieuse)
She's beautiful! Perfect flavour and colour for a spring wedding, I reckon, especially for people like me who aren't all girly-pink.
And gosh, I'm totally with you - piping, and most cake decorating for that matter, really tests my patience!
Sara
Thanks Rita, it was a fun first attempt, not too many tears.
Tina @ bitemeshowme
For your first attempt this is amazing! Your layers have the perfect gradient effect. And Love your 2-tone rosettes!
Sara
Thanks Tina!
Belle
Wow that looks amazing! I just realised it was the end of the month already and did not enter. Can't wait to see what you have up next month.
Sara
This month went sooooo quickly! Thanks Belle
Gareth
I'm not much of a baker, too much precision measuring, I also don't have a sweet tooth but a cake as pretty as this could win me over. Awesome photos Sara. Looks almost too good to eat. Almost.
Sara
Awe shucks, thanks Gareth.
Trent
WOW……I’m really impressed as I’m not a baker, never have tried and this totally makes me want to give it a go.
The layers look perfect and the decorations all came together and looks like you nailed it. Well done Sara!
Sara
I was really happy with the first attempt and I am keen to keep on going.
Tent
WOW......I'm really impressed as I'm not a baker, never have tried and this totally makes me want to give it a go.
The layers look perfect and the decorations all came together and looks like you nailed it. Well done Sara!
Keri
You should be extremely proud of your creation. Your cake is a thing of beauty - a vision of pink and lemon - as gorgeous as a prom dress!! It almost looks too beautiful to eat (almost)! I hope it was shared with a loving and appreciative audience.
Sara
Thanks Keri for your lovely words. The boys were very appreciative and enjoyed the cake a great deal.
Tina@foodboozeshoes
Sara, it looks amazing! What a great cake flavour too!
Sara
Thanks so much Tina.
nancy@jamjnr
That is pretty darn impressive for a first try - you are a braver woman than me It looks bloody fantastic.
Sara
Thanks so much Nancy!
Renata
Sara, First time piping icing onto a cake?? I would never say! In two colors?? I'm impressed! Your cake looks gorgeous and I love the pearls on top! Lemon is probably my all time favorite! Awesome, awesome, awesome!
Will be checking out Billy's baking Club :o)
Sara
Hope you check out Billy's club. Only is a shame it falls on the same date as Daring Bakers' reveal date.
Mary @ beyondjelly
Wow! You should definitely be thrilled - it all looks amazing!
Sara
Thanks so much Mary.
Phuoc'n Delicious
What a gorgeous cake!!! I've always wanted to try the multi-colour piping technique; I think you mastered it despite some mishaps. Everything about the cake; flavour, roses and ombre, is screaming out Spring/Summer time. Love it! Totally wishing I had the time (and a working oven) to bake...
Sara
Thanks Phuoc, I was happy with the outcome and yes, it really is summery.
milkteaxx
this looks stunning! does not look like you piped roses for the first time!
Sara
Thanks Milkteaxx, the joy of taking photos is you can sometimes hide the not so successful bits 😉