This easy pita pocket recipe will have you whipping up a batch of pita bread in no time. Use plain flour or make it a spelt flour recipe. Pita pockets are perfect for all sorts of fillings, dips and mezze plates.

Making flatbread at home is a pleasure due to the ease factor. You simply make a dough, roll 12 equal dough balls, flatten, and then bake. The hardest part is waiting for the dough to rise.
Pita pocket ingredients are pantry staples. Use plain or spelt flour. If you are new to using spelt flour it is readily available at most supermarkets, and health food shops.
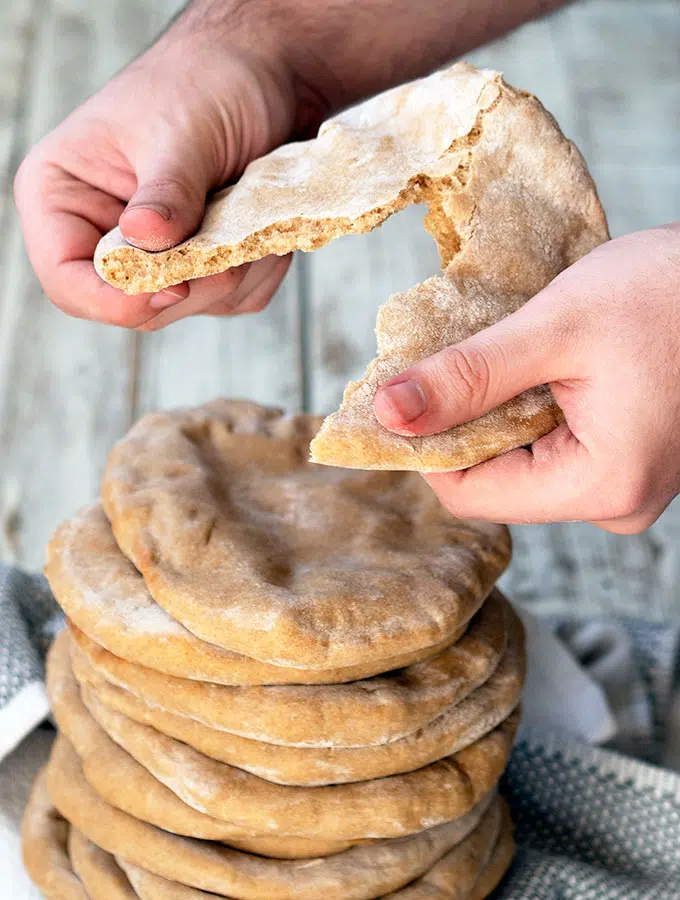
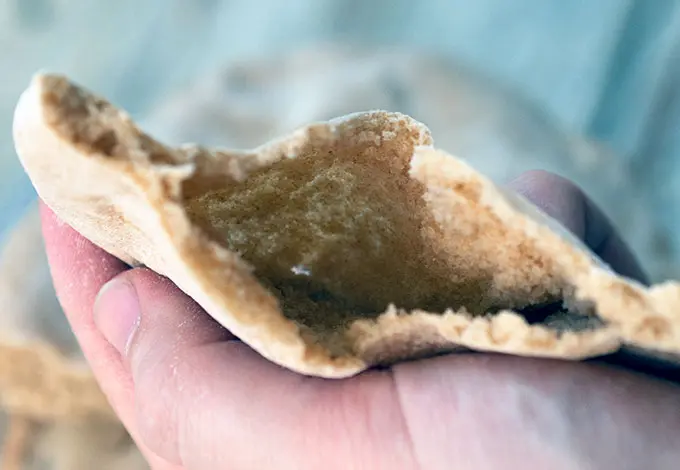
On baking, these babies are going to puff up in your oven. They will resemble bread balloons! The balloon is what creates the pocket once they have finished baking. Simply cut them in half and the pocket will be revealed. If they don't balloon, don't panic. They will still be just as delicious.
Sara xxx
What's in this post
Ingredients
- Yeast: The raising agent for the pita bread. I use dried yeast granules, also known as instant yeast or dry active yeast.
- Water: Lukewarm from the tap.
- Flour: I use spelt flour in this recipe, but it can be easily swapped out for plain flour.
- Salt: For a touch for flavour and to tighten the gluten strands that are formed, which makes them stronger.
- Olive Oil: This is used for texture and prevents toughness. It can be replaced with an oil of your choice.
Why Use Spelt Flour?
There are benefits to using spelt flour over normal white flour and I find I am using more and more of it in my baking. It's generally an easy 1:1 swap for wheat flour.
Spelt is a red grain with a slightly sweet and nutty flavour. It looks a little like barley. It is high in protein with a high vitamin and mineral content including magnesium, calcium, and iron. Lower in calories than wheat flour and easier for your system to digest.
One thing I do love about spelt flour used in pita bread is that it is a light grain. This makes a pita pocket made with spelt flour softer and more tender than using plain flour.

Pita Pocket Filling Ideas
- Cashew cauliflower falafel and Tabouli
- Leftover Rotisserie / BBQ Chicken with Tomato, Mozzarella, and Basil Salad
- Pulled Pork and Chickpea Salad
- Corned Beef, Mustard Pickles, and Salad
- Chicken Tenders with Broccolini Slaw
- BBQ Smoked Pork Belly and Fennel Slaw
- Zesty Chicken Quinoa Salad
- Ham Hash with Bread and Butter Cucumbers
How to Make Pita Bread

Preheat oven to 230°C (450°F)
In a large bowl sprinkle the yeast over the warm water. Stir to dissolve and then stir in 2 cups of flour (a cup at a time).
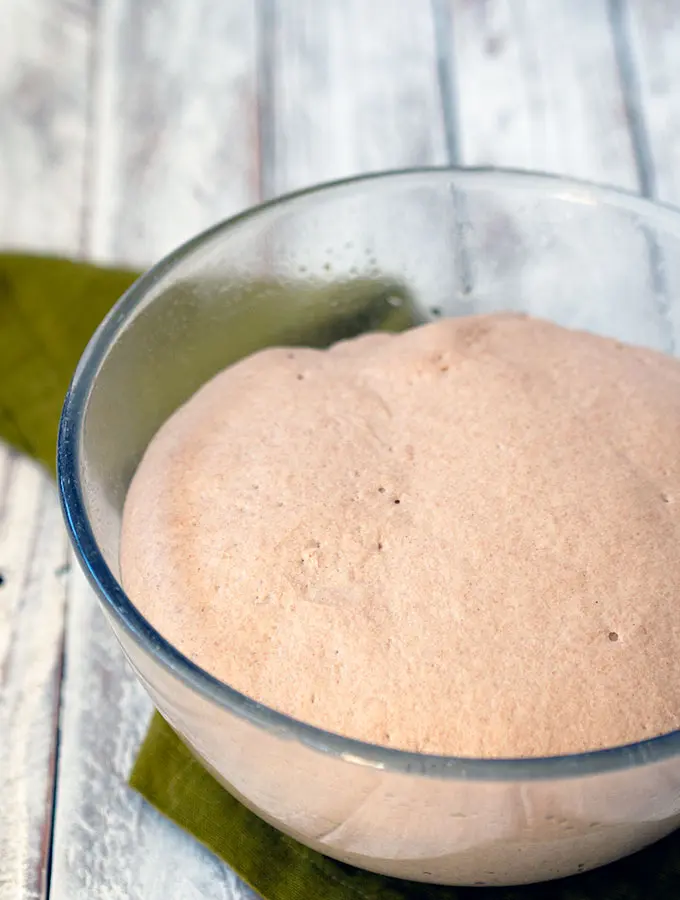
Stir 100 times, about a minute in the same direction to activate the gluten. Let this sponge rest for at least 10 minutes or as long as 2 hours.
Sprinkle salt over the sponge and stir in the olive oil. Mix well and then add more flour (one cup at a time) until the dough is too stiff to stir.
Knead dough either by hand or using a stand mixer until smooth and elastic.
Turn it out onto a lightly floured surface and knead for 8 - 10 minutes, until smooth and elastic.
Using the dough hook attachment knead the dough on low speed until smooth and elastic. Add more flour if needed. The dough should still be slightly sticky.


Scrape dough from hook and remove dough from the bowl. Rinse out the bowl, dry and lightly oil.
Return the dough to the bowl and cover with plastic wrap.
Allow the dough to rise until at least double in size, approximately 2 hours.
Once the dough has risen place a pizza stone, or baking sheet on the bottom rack of your oven.
Leave a 2cm (1 inch) gap all around between the stone/sheet and the oven walls to allow the heat to circulate.

Gently punch down the dough. Divide dough into 12 equal pieces and shape into balls. Cover with plastic wrap to prevent drying out while working.

Flatten a dough ball with lightly floured hands. With fingers press out the ball and use a rolling pin to create a 15cm (6 inches) round flat piece of dough less than 5mm (¼ inch) thick. Repeat with another ball of dough.
Place 2 circles of dough on to the stone/sheet and bake for 5 minutes, or until the bread has blown up like a balloon.If for some reason your bread doesn't puff up, don't worry it will still taste delicious.
Sara's Top Tips
- Pre-heat your oven for at least 15 minutes before cooking the first batch of bread.
- If you have a pizza stone use it in your oven to bake the pita pockets.
- Also have the pizza stone or baking sheet in the oven during the pre-heating stage.
- Place pizza stone or tray on the bottom of the oven when baking.
- When baking make sure you have your oven as hot as you can. This aids the pita bread balloning up while cooking to create the pocket.
- Wrap the baked pita bread together in a large kitchen towel to keep warm and soft while you bake the remaining dough.

Pita Bread FAQs
You can safely keep your pita in an air tight container or zip-lock bag for a few of days. Freshen up by reheating before serving.
Pita bread freezes very well. Place cooled pockets in a zip-lock, remove as much as as possible. Make sure to place a square of parchment / baking paper between each pita. This will make it easier to retrieve one pita at a time. Store in the freezer for up to 3 months.
Simply place a frozen pita pocket in a oven on medium heat. Once warm remove and enjoy.
Printable Recipe
Easy Pita Bread
Ingredients
- 2 teaspoons dry yeast
- 500 mls (2 cups) warm water
- 750 grams (5 ½ cups) flour | use wheat or spelt flour
- 3 teaspoons salt
- 2 tablespoons (8 teaspoons) olive oil
Instructions
- Preheat oven to 230°C (450°F).
- In a large bowl sprinkle the yeast over the warm water. Stir to dissolve and then stir in 2 cups of spelt flour (a cup at a time). Stir 100 times, about a minute in the same direction to activate the gluten. Let this sponge rest for at least 10 minutes or as long as 2 hours.
- Sprinkle salt over the sponge and stir in the olive oil. Mix well and then add more flour (one cup at a time) until the dough is too stiff to stir.
- Knead dough by hand or with a stand mixer (see below). Leave dough to rest and double in size.
- Once dough has doubled in size place pizza stone, or baking sheet on the bottom rack of your oven, leaving a 2cm (1 inch) gap all around between the stone/sheet and the oven walls to allow the heat to circulate.
- Gently punch down the dough. Divide dough into 12 equal pieces and shape into balls. Cover with plastic wrap to prevent drying out while working.
- Flatten a dough ball with lightly floured hands. With fingers press out the ball and use a rolling pin to create a 15cm (6 inches) round flat piece of dough less than 5mm (¼ inch) thick. Repeat with another ball of dough.
- Place 2 circles of dough on to the stone/sheet and bake for 5 minutes, or until the bread has blown up like a balloon. If for some reason your bread doesn't puff up, don't worry it will still taste delicious.
- Wrap the baked pita bread together in a large kitchen towel to keep warm and soft while you bake the remaining dough.
Knead Dough by Hand
- Turn it out onto a lightly floured surface and knead for 8 - 10 minutes, until smooth and elastic. Rinse out the bowl, dry, and lightly oil. Return the dough to the bowl and cover with plastic wrap. Let it rise until at least double in size, approximately 2 hours.
Knead Dough by Stand Mixer
- Using the dough hook attachment knead the dough on a low speed until smooth and elastic (around 8 minutes). Add more flour if needed. The dough should still be slightly sticky.
- Scrape dough from hook and remove dough from the bowl. Rinse out the bowl, dry, and lightly oil. Return the dough to the bowl and cover with plastic wrap. Let it rise until at least double in size, approximately 2 hours.
Oven Temperatures
All oven temperatures are fan forced.
Measurement Notes
All measurements are Australian metric standard. All measures are level, and cups are lightly packed unless specified. 1 teaspoon = 5ml / 1 tablespoon = 20mls / 1 cup = 250ml /4 teaspoons = 1 tablespoon.
Recipe Notes
- Pre-heat your oven for at least 15 minutes before cooking the first batch of bread.
- If you have a pizza stone use it in your oven to bake the pita pockets.
- Also have the pizza stone or baking sheet in the oven during the pre-heating stage.
- Place pizza stone or tray on the bottom of the oven when baking.
- When baking make sure you have your oven as hot as you can. This aids the pita bread ballooning up while cooking to create the pocket.
- Wrap the baked pita bread together in a large kitchen towel to keep warm and soft while you bake the remaining dough.
- 1 teaspoon equals 5ml
- 1 tablespoon equals 20 ml (Nth America, NZ & UK use 15ml tablespoons)
- 1 cup equals 250ml (Nth America use 237ml)
- 4 teaspoons equal 1 tablespoon
- I use the below unless specified in my recipes;
NUTRITIONAL INFORMATION
The recipe's nutritional information is an approximation based on an online calculator. It is meant solely for reference purposes. If you're looking for precise details, be sure to double-check with your own research.

lee
Hi. I made these for the first time. I will get the hang of it next time. but they taste good and all pitta breads rose. thank you
Sara McCleary
Hi Lee
So glad to hear that they all rose. I always get one lazy pita LOL.
Cheers, sara
oran aviv
Wow, I just made these and am so surprised how easy these are to make, how great the whole house smelled and how delicious these are. Today is Israel's Independence day , but in lock down we can't really celebrate outside with a picnic. It was great to be able to make these fresh pita with homemade hummus to celebrate inside.. Thanks.
Sara McCleary
Hi Oran, so glad you found them easy to prepare and that you ended up having a great indoor celebration for Israel's Independence Day.
Josie
I've been looking for an easy spelt pita pocket recipe, Will be giving these a go.
Sara
So glad you found them! Hope you enjoy them when you bake them.
Sally May
Sara I love this recipe! I made them on the weekend and they were fantastic, thank you.
Sara
That is fantastic to hear! Glad they were a success.
B?o Hi?m Cho B?n
Pita recipe is great, simple and delicious, you are really great to share this recipe, I will try making pita today.
Sara
Fantasticm, hope they were a hit when you made them.