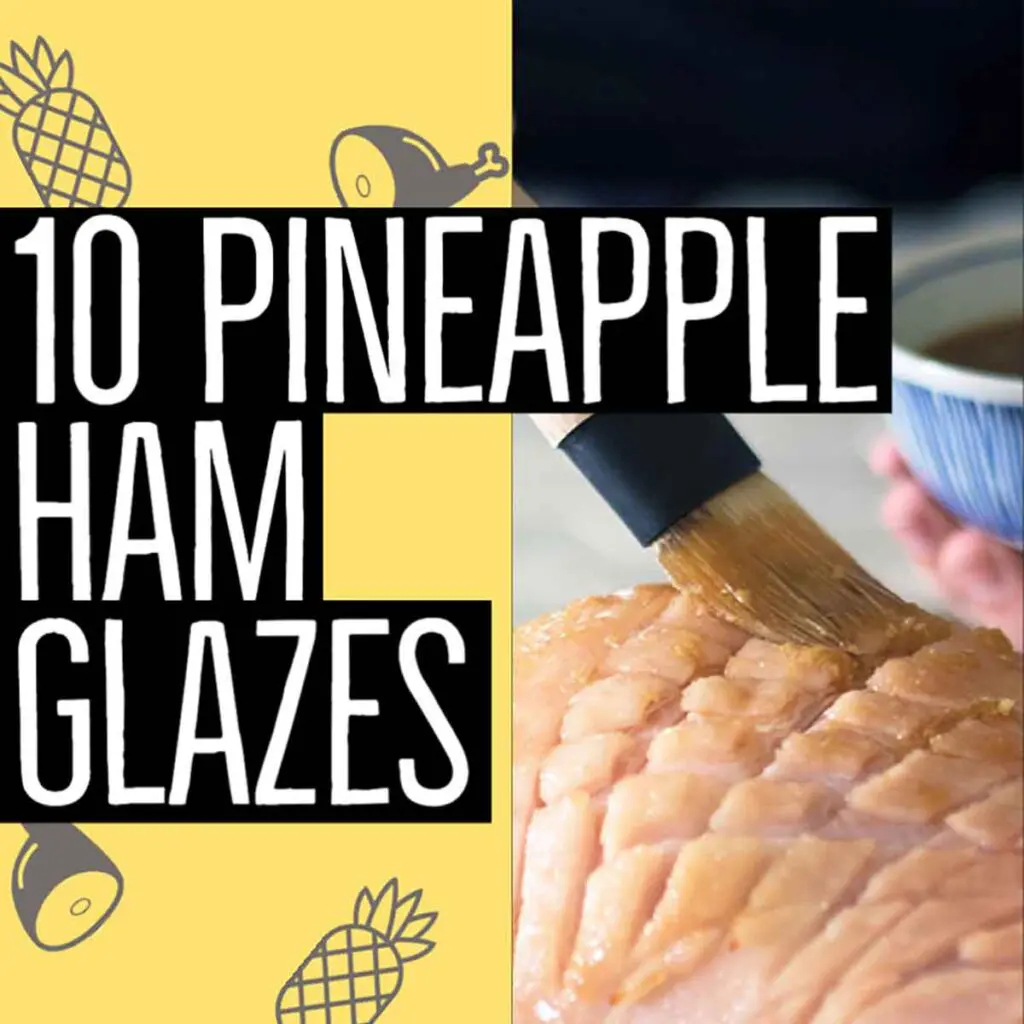
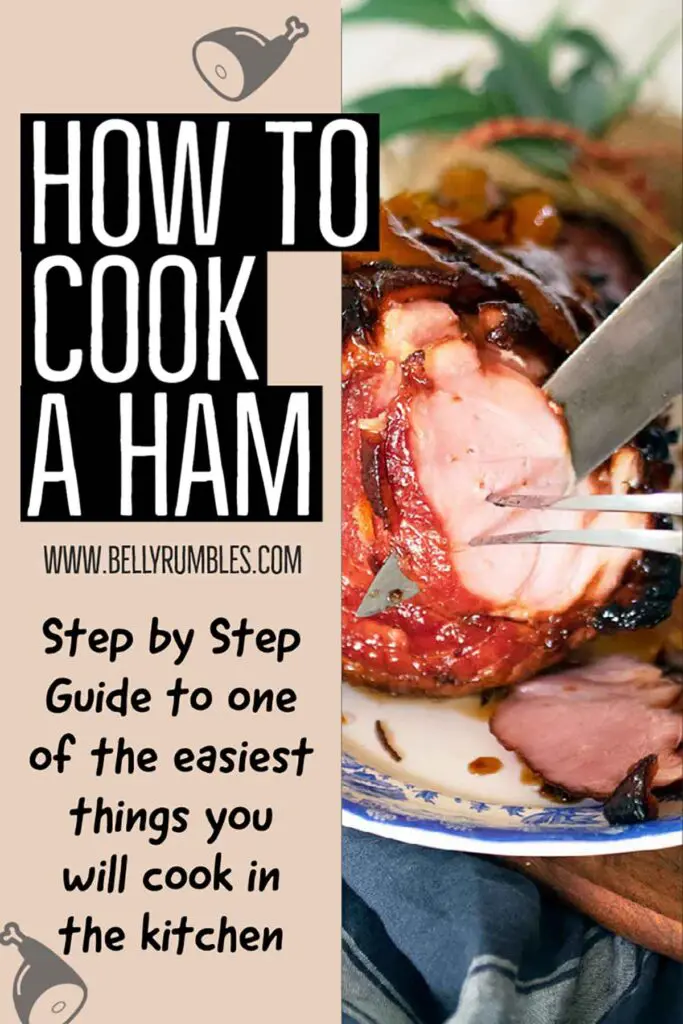
Knowing how to cook a ham properly is a great culinary technique to have up your sleeve. Even though baking a ham is a simple process, this step-by-step guide for the dos and don'ts will ensure it's a stress-free process.

What's in this post
What ham should I buy?
It is important to note that all the hams I am discussing and referring to are already cooked and ready to eat (city ham).
I'm not referring to raw ham (also known as gammon), which is cured and smoked, but still needs to be cooked properly. Nor (for my USA readers) country ham.
As we go through the process of how to cook a ham, all cooking times and steps are for pre-cooked ready to eat hams. My personal choice of ham is semi-boneless. I like the look and convenience of the bone when carving.
- Bone-in: A whole ham that is still on the bone. The classic large showstopper has the hock at one end and then expands out into an oval-shaped ham leg.
- Half Ham: A bone-in ham cut in half. The top half is called the butt, it is the leaner, more tender half of a whole ham. The bottom half is called the shank, which has more flavour but is also fattier.
- Semi Boneless: Also known as Easy Carve Ham, all the bones are removed except the central bone (the hock/shank part). The meat of the ham is formed around the bone to create that classic ham shape. Having the bone still there makes it easier to carve.
- Boneless Ham: All the bones are removed and the ham meat formed into a round, oval or log shape. They may not be as stylish as a traditional bone-in ham, but you are getting 100% meat for your money. Not the perfect choice for glazing, but they can be.
- Crackle Shoulder Ham: These hams are designed to be baked without glazing. Crackling ham still has the rind on and produces crackling just the same as a traditional pork roast.
- Spiral Cut Ham: Something we don't have here in Australia, but my American readers would know it well. Spiral cut ham is a bone-in ham that has been cut in one continuous spiral from the outside to the bone. Think of it like a ham slinky with the bone holding it all together in its original shape. No need to carve the ham you simply cut off the slices. I'm sure this will turn up in Australia one day.
- Smoked or Unsmoked: This is up to your personal taste. You have a choice of unsmoked, smoked, and ham with a heavier smoke is often called triple smoked.

What size ham?
Buy a ham that is the right size for the amount of people you are feeding. Of course factor in for some to be leftover and enjoyed after the event.
The below bone-in ham sizes will give you an idea of the size you need to feed hungry guests.
3 kg (6.6 lb): 10-14 serves
4 kg (8.8 lb): 12-16 serves
5 kg (11 lb): 15-20 serves
6 kg (13.2 lb): 18-22 serves
7 kg (15.4 lb): 20-25 serves
8 kg (17.6 lb): 23-27 serves
*Lower number if ham is the only main - Higher number if serving ham with one/two other main dishes.
Preparing the ham
Using a small sharp knife cut a zig-zag pattern around the shank end of the ham. You want to make this cut about 10cm from the end of the bone.

Run the knife around the edge of the ham rind. Then run your fingers under the rind of the ham, between the fat layer and the skin. You will find that the skin will slowly separate from the fat layer. Take it slow, don't rush it. Do not remove the fat.

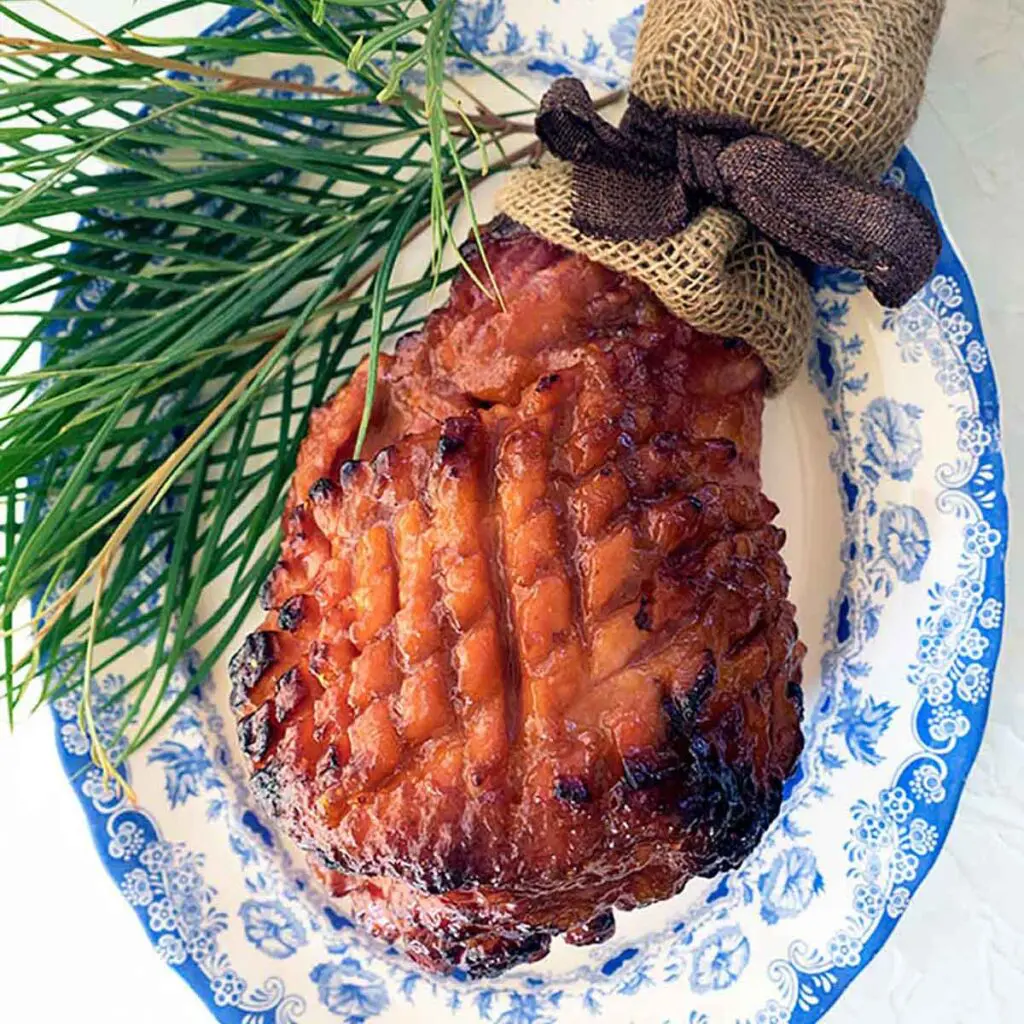
Once you have removed the skin from the ham, with a sharp knife score the fat, about 1cm deep, in a diamond pattern. Be careful not to cut into the ham meat, you only want to score the fat.
The fat will render (shrink in size) during cooking. Deep scoring may expose the ham meat when cooking and spoil the look of your ham.
Scoring helps the glaze adhere to the ham better. The glaze also gets in between all those score marks to create a stickier more flavoured end result. It also looks great for presentation.
Glaze Glaze Baby
What glaze you use to cook your ham is all personal taste. There is no wrong way, but there are a few rules to follow.
Sugar of some sort is the most important ingredient in a glaze. It can be brown sugar, maple syrup, or even honey. The sugar is what caramelises the ham so it gets that gorgeous sticky sheen.
Glaze the ham religiously. Brush it over every 10 - 15 minutes. You want to build up that glaze for a deep rich layer of flavour.

Cooking Walk Through
After preparing your ham and glaze it is time to go through the easy steps of how to cook a ham.
- Take ham out of the fridge 30 minutes to an hour brfore cooking. Time out of the fridge depends on where you are situated in the world (is it summer or winter?), and if you have air conditioning.
- Pre-heat oven 180°C (360°F).
- Place a roasting rack into your chosen baking tin/roasting tray. It needs to be one big enough to fit the whole ham.
- Pour some water into the baking tin. This will catch all the drippings and juices while the ham is cooking. It prevents them from burning and allows you to base the ham. You can add some wine or juice to the water for extra basting flavour.
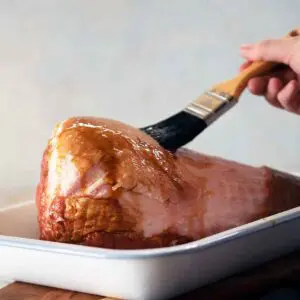
- Put the ham on the roasting rack and give it a generous brush of glaze.
- Place the ham in the oven to cook. Baste and glaze (until glaze is used up) every 10-15 minutes while it is in the oven. You want a thick, luscious, sticky glaze layer of flavour.
- If some parts of the ham look like they will start to burn, cover them with aluminium foil until the rest of the ham has finished caramelising and looks gorgeous. This way they have will have a nice even colour.

Cooking Times
Below are the cooking times for both bone-in and boneless hams at oven temperature 180°C (360°F).
Remember that your ham is already cooked. The time it spends in the oven is to warm it through and create a gorgeous sticky glaze. If you overcook your ham it may become dry. Which you want to avoid. Don't overcook your ham.
2 kg (4.4 lb): 40 mins
2.5 kg (5.5 lb): 50 mins
3 kg (6.6 lb): 1 hour
3.5 kg (7.7 lb): 1 hour 10 mins
4 kg (8.8 lb): 1 hour 20 mins
4.5 kg (9.9 lb): 1 hour 30 mins
5 kg (11 lb): 1 hour 40 mins
5.5 kg (12.1 lb): 1 hour 50 mins
6 kg (13.2 lb): 2 hours
*Add 10 minutes for every half a kilo/1.1 pounds in addition to the 6kg/13.3lb cooking time for larger sizes.

Make Ahead
If you want to bake your ham on the day
- Make the glaze a few days ahead and store it in the fridge.
- Remove the rind from the ham one or two days before. Place the removed rind back on the ham, and wrap the ham in a damp (not wet) clean tea towel before placing it back in the fridge to keep it from drying out.
- Then simply baste and bake on the day.
How to cook a ham entirely ahead of time?
- Cook the ham entirely as per instructions.
- Let it cool completely.
- Pour all the pan juices into an airtight container and store in the fridge.
- Cover the ham with baking (parchment) paper, and then wrap entirely in foil. Place in the fridge until needed. You can do this a few days before you want to serve the ham.
- On the day remove the ham from the fridge and place in a pre heated oven 160°C/320°F for around an hour.
- Place reserved pan juices in a saucepan to warm. Brush the ham with the warmed pan juices while it is reheating. This ensures the ham looks gorgeously glazed and just cooked.
Side Dishes & Sauces
When thinking about what sauce to serve with your ham, think about the glaze you have used. Choose something that compliments those flavours. I tend to have a couple of sauce options, one with a kick of heat or booze, the other more subtle.
- Cranberry Sauce
- Honey Mustard, Grainy Mustard, Dijon etc
- Apples Sauce
- Carrot and Zucchini Pickles
- Pineapple chutney
- Chilli Plum Sauce
- Red Currant Sauce
The ham is the glowing centre piece and the side dishes you choose will be what sets the tone of the meal. Fresh and light sides for a lighter summery feel, or heavier baked sides for a comfort meal.
- Braised Red Cabbage
- Stuffed Hasselback Potatoes
- Collard Greens
- Baked Stuffed Onions
- Green Bean Casserole
- Broccolini Slaw
- Honey Glazed Carrots

Storing Leftovers
Glazed ham will safely be kept for a week in the fridge, or you can freeze it for up to 3 months. It is best to keep the ham on the bone and then carve as desired.
I don't store glazed hams in a ham bag. Ham bags are best for hams that haven't gone through the glazing and cooking process.
How do I deal with my excess ham? In a couple of ways. I slice up a fair amount and place it in a vacuum-sealed container for the family to help themselves for sandwiches etc. I find if I don't slice it and make it easy for them, it does not get eaten.
You can also cut off large chunks of leftover ham from the bone. Place in a vacuum-sealed bag for later, or freeze. Yes, you can freeze cooked ham.
Another suggestion is to finely dice the ham and freeze it in ½ cup portions. You can then easily defrost it down the track for quiches, frittatas, omelettes, jaffles, and even soup, the list goes on!
Don't discard the ham bone. This can be used to make soup. It can be frozen for later use.
How to use Leftover ham?
Leftover ham is so versatile. As mentioned above it can be used in so many dishes. After a few days of traditional holiday dishes I crave a kick of chilli and Asian inspired food.
- Ham and Pineapple Fried Rice
- Frittata
- Jaffles
- Ham & Egg Hash Brown Nests
- Spring Rolls
- Ham Hash
- Ham and Cheese Puff Pancake
- Quiche Lorraine
- Ham Hand Pies with Brie & Thyme
- Pizza
- Ham Quesadillas
- Ham and Corn Chowder
- Ham, Cheese and Chilli Scones
- Ham and Lentil Soup
Ham Glaze Recipes
Below are some great ham glaze recipes to make your ham cooking adventure complete!


Printable Recipe
How to Cook a Ham
Special Equipment
- chopping board + sharp knife
- baking tin/roasting tray
- roasting rack
Ingredients
- 4 kg leg ham of choice | refer to notes below for the right size ham for your needs
- 1 -2 cups water
GLAZE (choose one)
- 1 quantity Peach and Bourbon Glaze | beautifully rounded glaze
- 1 quantity Rum and Coca Cola Glaze | a fun but delicious glaze twist
- 1 quantity glaze of your choice
Instructions
- Take ham out of the fridge 30 minutes to an hour prior to cooking. Time out of the fridge depends on where you are situated in the world (is it summer or winter?), and if you have airconditioning.
- While ham is coming to room temperature make ham glaze of choice.
Preparing the Ham
- Using a small sharp knife cut a zig-zag pattern around the shank end of the ham. You want to make this cut about 10cm from the end of the bone.
- Run the knife around the edge of the ham rind. Then run your fingers under the rind of the ham, between the fat layer and the skin. You will find that the skin will slowly separate from the fat layer. Take it slow, don't rush it. Do not remove the fat.
- Once you have removed the skin from the ham, with a sharp knife score the fat, about 1cm deep, in a diamond pattern. Be careful not to cut into the ham meat, you only want to score the fat.
- The fat will render (shrink in size) during cooking. Deep scoring may expose the ham meat when cooking and spoil the look of your ham
Glazing and Baking the Ham
- Pre-heat oven 180°C (360°F).
- Place a roasting rack into your chosen baking tin/roasting tray. It needs to be one big enough to fit the whole ham.
- Pour some water into the baking tin. This will catch all the drippings and juices while the ham is cooking. It prevents them burning and allows you to base the ham. You can add some wine or juice to the water for extra basting flavour.
- Put the ham on the roasting rack and give it a generous brush of glaze.
- Place the ham in the oven to cook. Baste and glaze (until glaze is used up) every 10-15 minutes while it is in the oven. You want a thick, luscious, sticky glaze layer of flavour.
- If some parts of the ham look like they will start to burn, cover them with aluminium foil until the rest of the ham has finished caramelising and is looking gorgeous. This way the have will have a nice even colour.
Serving the Ham
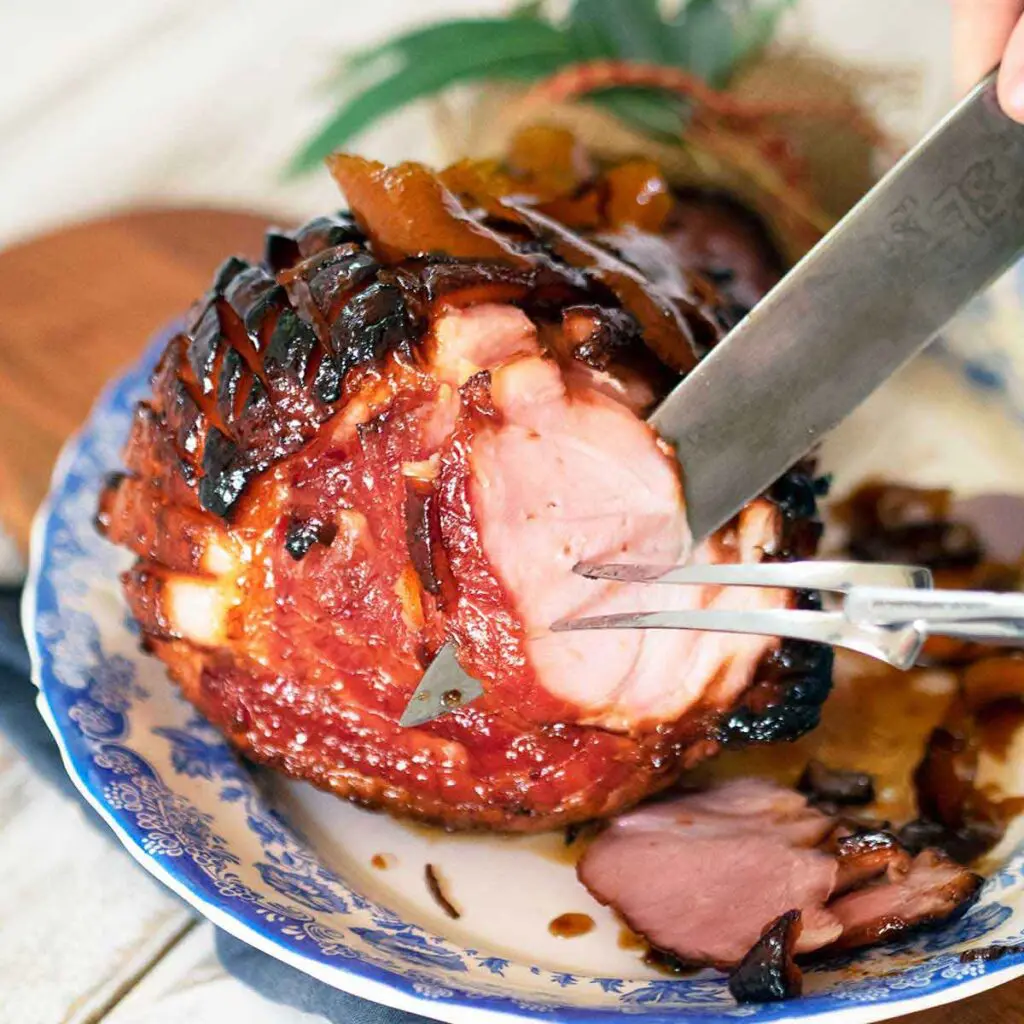
- The ham can be served warm or cold, it comes down to preference.
- You can carve at the table for maximum impact. Or carve in the kitchen and place the whole ham and slices on a platter on the table.
Oven Temperatures
All oven temperatures are fan forced.
Measurement Notes
All measurements are Australian metric standard. All measures are level, and cups are lightly packed unless specified. 1 teaspoon = 5ml / 1 tablespoon = 20mls / 1 cup = 250ml /4 teaspoons = 1 tablespoon.
Recipe Notes
- Bone-in: A whole ham that is still on the bone. The classic large showstopper, which has the hock at one end and then expands out into an oval shaped ham leg.
- Half Ham: A bone-in ham cut in half. The top half is called the butt, it is the leaner, more tender half of a whole ham. The bottom half is called the shank, which has more flavour but is also fattier.
- Semi Boneless: Also known as Easy Carve Ham, all the bones are removed except the central bone (the hock/shank part). The meat of the ham is formed around the bone to create that classic ham shape. Having the bone still there makes it easier to carve.
- Make the glaze a few days ahead and store it in the fridge.
- Remove the rind from the ham one or two days before. Place the removed rind back on the ham, and wrap the ham in a damp (not wet) clean tea towel before placing it back in the fridge to keep it from drying out.
- Then simply baste and bake on the day.
- Cook the ham entirely as per instructions.
- Let it cool completely.
- Pour all the pan juices into an airtight container and store in the fridge.
- Cover the ham with baking (parchment) paper, and then wrap entirely in foil. Place in the fridge until needed. You can do this a few days before you want to serve the ham.
- On the day remove the ham from the fridge and place in a pre heated oven 160°C/320°F for around an hour.
- Place reserved pan juices in a saucepan to warm. Brush the ham with the warmed pan juices while it is reheating. This ensures the ham looks gorgeously glazed and just cooked.
- 1 teaspoon equals 5ml
- 1 tablespoon equals 20 ml (Nth America, NZ & UK use 15ml tablespoons)
- 1 cup equals 250ml (Nth America use 237ml)
- 4 teaspoons equals 1 tablespoon
- I use the below unless specified in my recipes;
NUTRITIONAL INFORMATION
The recipe's nutritional information is an approximation based on an online calculator. It is meant solely for reference purposes. If you're looking for precise details, be sure to double-check with your own research.

Leave a Reply